Beyond the Lines: 3 Simple Blending Techniques That Make Your Pet Coloring Pages Pop
You’ve got your Pets Unplugged coloring book and your pencils sharpened — now it’s time to bring that adorable pup to life! While simply coloring within the lines is relaxing, a few easy techniques can transform a flat page into a vibrant illustration, ready for its animated QR code debut.
Here are three simple blending and shading techniques to maximize the look of your pet artwork.
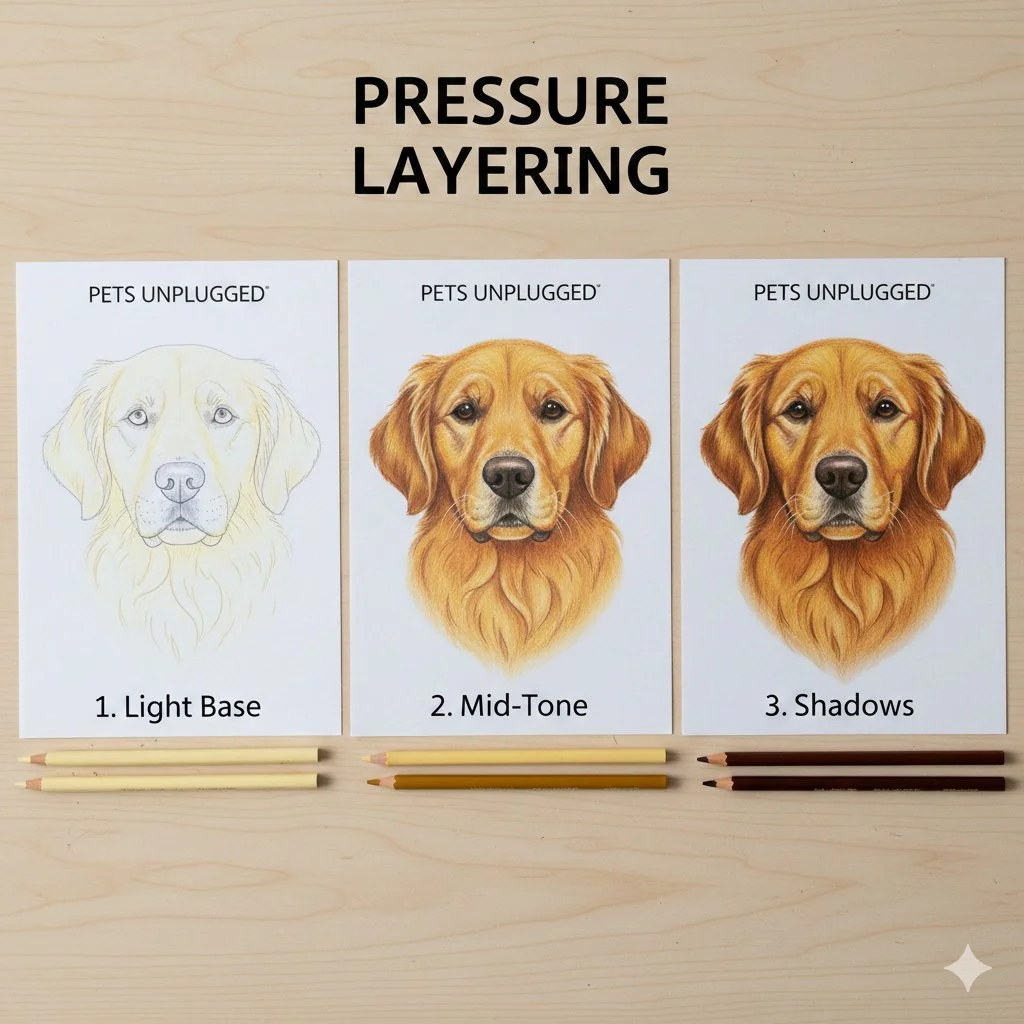
1. Pressure Layering: Achieving Rich Saturation
The secret to rich, deeply saturated color isn’t just pressing hard — it’s building up color slowly using varied pressure.
- Step 1 (Light Base): Start with the lightest color (e.g., pale yellow for a golden retriever) and apply it using very light, circular pressure. Cover the entire area you are coloring.
- Step 2 (Mid-Tone): Introduce your main color (e.g., medium gold). Apply it over the base color with slightly increased pressure, but still gently.
- Step 3 (Shadows): Use a darker color (e.g., brown) only in the areas where shadows naturally fall — under the chin, in creases, or around the eyes.
By layering three colors gently, the pigments mix optically on the paper, resulting in a deeper, more realistic color that looks incredible when your QR animation plays.
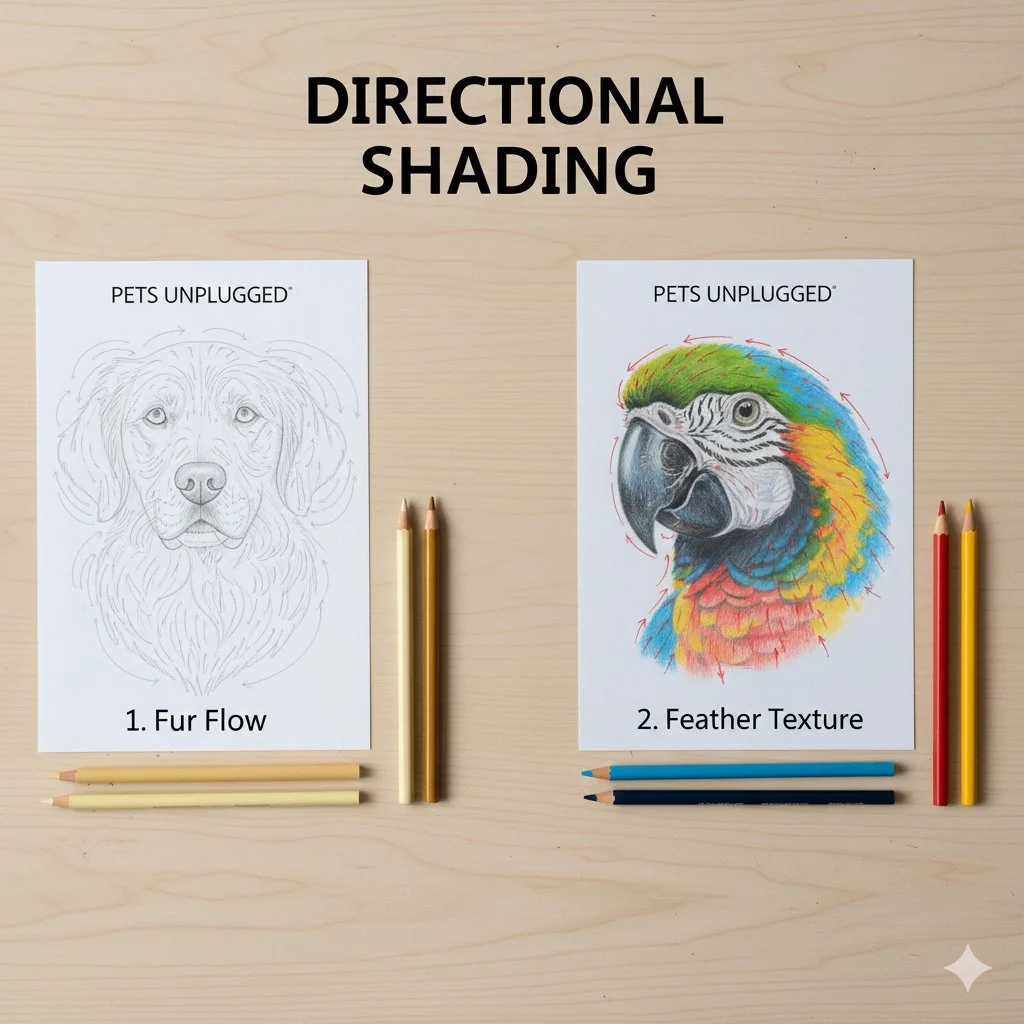
2. Directional Shading: Mastering Fur and Feathers
When coloring animals, avoid coloring straight across the page. Instead, let your pencil strokes mimic the direction the hair or feathers grow.
- Find the Flow: Look at the illustration. Does the fur on the dog’s head go forward, and the fur on the back go down? Follow that natural flow.
- Short Strokes: Use short, rapid strokes where the hair is short (like a muzzle) and longer, more sweeping strokes for long fur (like a tail).
- Create Dimension: This technique creates automatic texture and volume, making the animal look three-dimensional rather than flat.
This is especially effective on the dog illustrations in our PAWS interactive coloring book, where each breed has its own distinct coat direction.
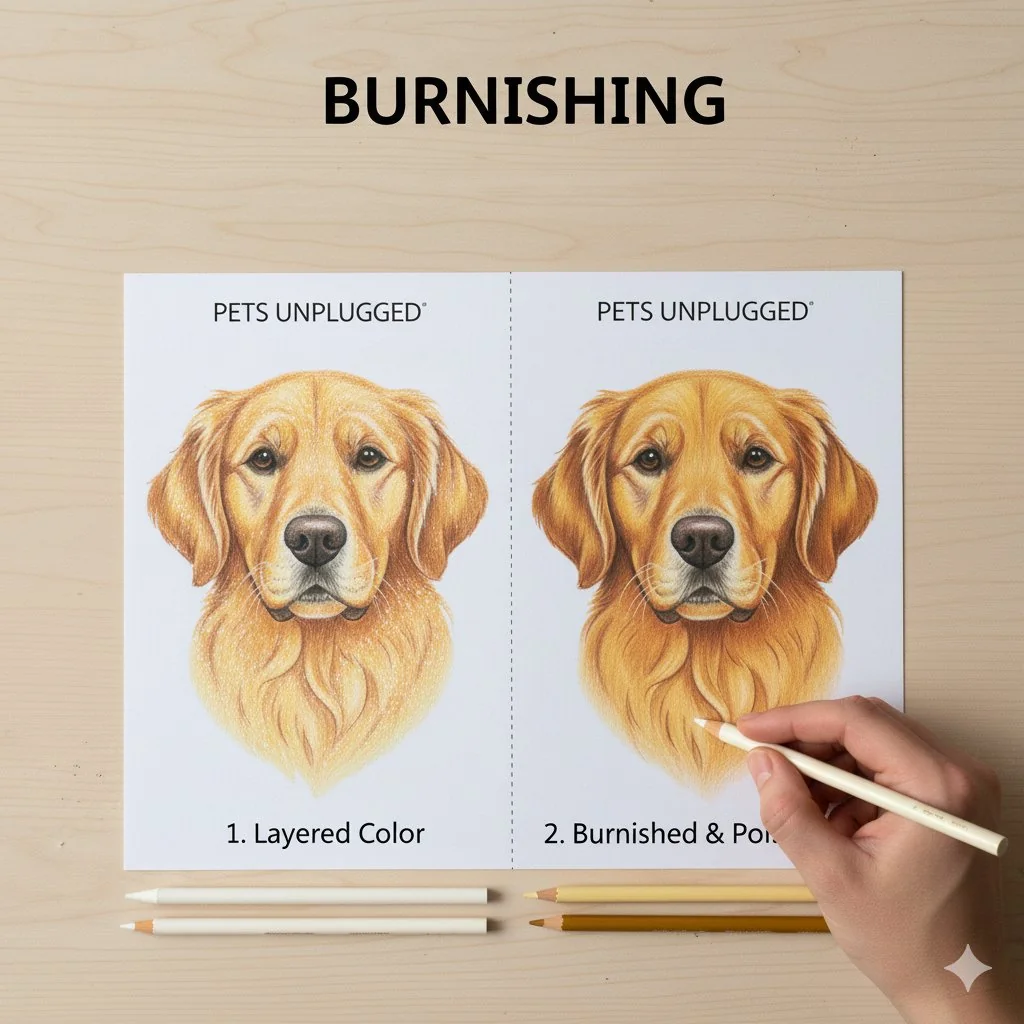
3. Burnishing: The Final Pop and Polish
Burnishing is the process of using extreme pressure to fully blend the pigments you have already layered, eliminating the white specks of paper texture (the “tooth”).
- The Tool: You can use a dedicated colorless blender pencil, a white pencil, or even a pale yellow pencil if you are coloring a light area.
- The Action: Once your color layers are complete, press down firmly with your chosen tool and move it over the layered area.
- The Result: The layers compact and blend into a smooth, vibrant, and slightly glossy finish. This high-saturation look shines beautifully when you scan the QR code to see your finished art animated!
Mastering these three techniques will significantly elevate your finished Pets Unplugged pages, making the experience even more rewarding. Now go grab your pencils and start creating some magic!
Ready to try these techniques? Download a free sample page — no email required — and put these tips to the test right now!